

To diagnose driveline vibration in a classic car, first identify whether it follows road speed, engine RPM, or changes in drivetrain load.
Then use that pattern to guide inspection of the wheels and tires, driveshaft, U-joints, mounts, and related components.
Start with the safety checks below, then use the quick guide to narrow your inspection. A vibration pattern points toward possible causes; it does not confirm which part has failed.
When Should You Avoid a Road Test?
Do not road-test a classic car with:
- Severe or rapidly worsening vibration
- A visibly damaged or loose driveshaft
- Grinding or scraping
- Rapid fluid loss
- Severe clunking
- A component contacting the floor, body, or exhaust
Arrange professional inspection or transportation instead. Road testing should be performed only when the vehicle can be operated safely.
Physical inspection beneath the vehicle also requires appropriate lifting and support equipment.
Quick Driveline Vibration Guide
| When the vibration occurs | Starting areas to inspect |
|---|---|
| At a consistent road speed | Wheels, tires, driveshaft balance, wheel or axle runout |
| At a consistent engine RPM | Engine, accessories, flywheel, clutch, converter, or mounts |
| Under acceleration | U-joints, mounts, operating angles, or rear-suspension movement |
| During deceleration | Operating angles, pinion bearings, driveshaft, or differential |
| Only in one gear | Gear-specific load, RPM resonance, or transmission concerns |
| Changes with passengers or load | Ride height, mounts, carrier bearing, or operating angles |
| Only while braking | Rotors, drums, hubs, wheels, or suspension |
| Changes after warm-up | Mount movement, exhaust contact, bearings, converter, or clutch |
These are possible starting points—not final diagnoses.
Step 1: Document the Operating Pattern
During a safe, controlled road test, record:
- Exact speed range
- Engine RPM
- Selected gear
- Throttle position
- Acceleration or deceleration
- Whether it changes after warm-up
- Where the vibration is felt
- Recent repairs or modifications
Also document whether the symptom began after:
- Lowering or raising the vehicle
- Replacing springs or suspension bushings
- Installing an engine or transmission
- Changing wheels or tires
- Collision or underbody damage
These details help identify which systems changed before the vibration appeared.
If the vibration began after a transmission conversion, our guide to overdrive swaps versus rebuilding the original transmission covers installation considerations such as driveshaft modifications and crossmember adjustments.
Step 2: Separate Road-Speed From Engine-Speed Vibration
Vibration at the same road speed in different gears points toward components that rotate with vehicle speed.
Vibration at the same engine RPM points toward engine-speed-related sources.
If the vibration occurs at approximately the same road speed in different gears, inspect components that rotate with vehicle speed, including:
- Wheels and tires
- Driveshaft
- U-joints
- Axles
- Hubs
- Differential
If it occurs at approximately the same engine RPM in different gears—or while the vehicle is stationary during controlled professional testing—the source may be related to:
- Engine operation
- Fan or accessory drive
- Flywheel or flexplate
- Clutch
- Torque converter
- Engine or transmission mounts
Use this distinction to choose the next inspection. For road-speed vibration, begin with the wheel, tire, hub, brake, and axle checks below.
For engine-RPM vibration, have a technician evaluate engine operation, accessories, mounts, and the relevant flywheel, clutch, or torque-converter components.
A change with gear selection can also reflect load or resonance, so this comparison guides diagnosis rather than confirming a failed part.
For a deeper breakdown on distinguishing chassis rumbles from drivetrain noise, see Hagerty’s guide to diagnosing classic car vibrations and rumbles.
Step 3: Check Wheels, Tires, Hubs, Brakes, and Axle Runout
Rule out common road-speed vibration sources before assuming the driveshaft or transmission is responsible.
Inspect for:
- Tire imbalance
- Flat spotting after storage
- Tire separation or damage
- Bent or incorrectly seated wheels
- Loose wheel hardware
- Wheel or tire runout
- Hub or axle-flange runout
- Brake rotor or drum variation
- Worn wheel bearings
Steering-wheel shake may direct attention toward the front wheels, hubs, brakes, or suspension.
Vibration through the floor or seat may involve the rear wheels, driveshaft, axle, or differential. These are clues only because vibration can travel through the chassis.
When necessary, a technician may use a dial indicator and isolate the tire, wheel, hub, brake drum or rotor, axle flange, and axle shaft to determine where runout begins.
A wheel can be balanced and still produce vibration if another rotating component has excessive runout.
Step 4: Compare Acceleration and Deceleration
A vibration that appears under acceleration may direct inspection toward components whose position or operating angle changes under torque, including:
- U-joints
- Transmission mount
- Driveshaft
- Rear-suspension bushings
- Axle location
- U-joint operating angles
A vibration that becomes more noticeable during deceleration may involve driveshaft condition, operating-angle changes, pinion bearings, rear-suspension movement, or the differential.
Record clunks, backlash, and sustained vibration separately. A clunk during a throttle change does not automatically explain a continuous vibration.
Step 5: Inspect the U-Joints and Slip Yoke
U-joints should be inspected for:
- Looseness
- Binding or stiffness
- Corrosion around bearing caps
- Missing retaining clips
- Incorrect installation
- Dry or damaged seals
- Uneven movement
A U-joint may cause problems when it is loose, dry, binding, corroded, or installed incorrectly. Some wear can be difficult to detect while the driveline is loaded.
The slip yoke should also be checked for excessive wear, unsuitable engagement, damaged splines, and evidence of binding or leakage.
For a focused comparison, see our guide to bad slip-yoke symptoms versus failed U-joints.
Step 6: Inspect Driveshaft Condition and Runout
Check the driveshaft for:
- Dents or bent tubing
- Missing balance weights
- Damaged welds
- Contact marks
- Incorrect length
- Inadequate slip-yoke engagement
- Previous modification or repair
A driveshaft can be balanced yet still vibrate because of runout, incorrect installation, phasing, unsuitable operating angles, or insufficient yoke engagement.
Runout and balance are different conditions. Runout should be measured with appropriate equipment rather than judged solely by visual inspection.
Step 7: Inspect Mounts and Contact Points
A collapsed, separated, loose, or incorrectly positioned engine or transmission mount may:
- Allow excessive drivetrain movement
- Change driveshaft operating angles
- Create contact with the exhaust or body
- Produce clunks during throttle changes
- Contribute to vibration under load
Check for contact marks on the exhaust, floor, crossmember, bellhousing, transmission, and surrounding components.
Mount condition should be verified before driveshaft or pinion angles are adjusted.
Step 8: Verify Driveshaft Phasing
Driveshaft phasing describes the relationship between the yokes in a shaft assembly.
Incorrect phasing may prevent the rotational-speed changes created by the U-joints from canceling properly, potentially producing a cyclical vibration.
Phasing problems can occur after:
- Driveshaft fabrication
- Driveshaft rebuilding
- Incorrect assembly of a splined multi-piece shaft
- Improper repair
On a conventional welded one-piece driveshaft, inspect for fabrication or repair errors rather than assuming its yokes changed position during routine removal.
Phasing should be evaluated together with runout, balance, and operating angles.
Step 9: Measure U-Joint Operating Angles
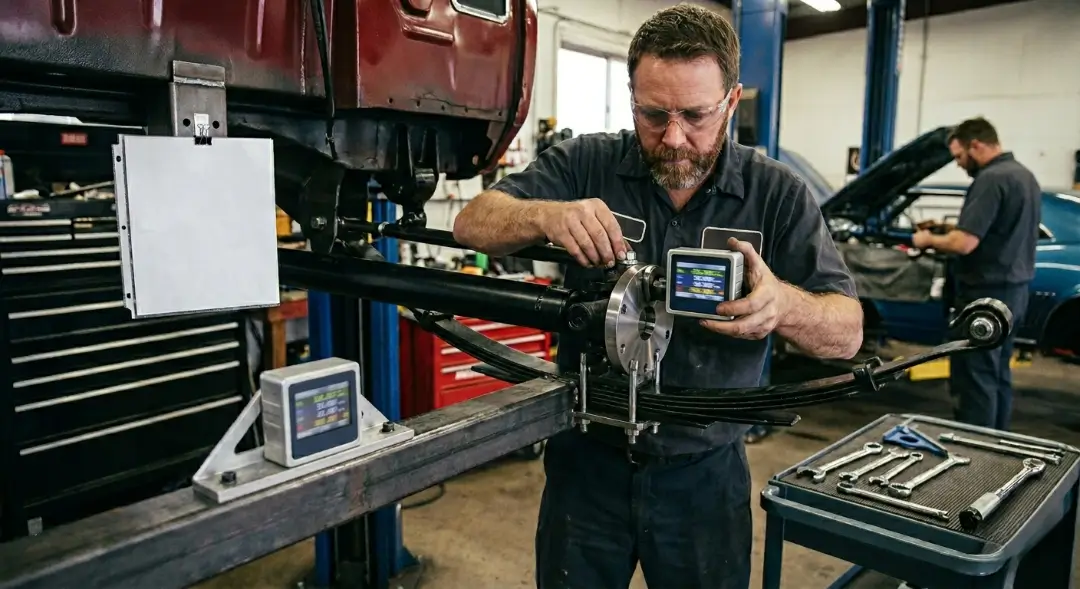
The relevant measurements are the operating angles at the front and rear U-joints—not the pinion angle alone.
A complete evaluation may include:
- Transmission output-shaft angle
- Driveshaft angle
- Rear pinion-yoke angle
- Front U-joint operating angle
- Rear U-joint operating angle
Measurements should be taken with the vehicle at its normal ride height and under the conditions specified by the vehicle or driveline specialist.
Before changing an angle, inspect:
- Engine and transmission mounts
- Crossmember position
- Rear-suspension height
- Spring and bushing condition
- Axle location
- Driveshaft length
A collapsed mount can affect the measurements.
Leaf-spring axle movement may also change the operating angles under acceleration, so static measurements do not always represent loaded conditions.
There is no single universal angle setting for every classic car. Use the applicable vehicle, driveshaft, or component-manufacturer specifications.
Step 10: Inspect the Carrier Bearing
If your classic car has a two-piece driveshaft with a center support bearing, inspect the bearing and its rubber support.
Skip this step if your vehicle has a one-piece driveshaft.
Inspect for:
- Deteriorated rubber support
- Bearing roughness or play
- Incorrect alignment
- Excessive shaft movement
- Mounting damage
- Improper driveline angles
A deteriorated carrier-bearing assembly may contribute to thumping, shudder, or speed-sensitive vibration.
The surrounding driveshaft sections, U-joints, mounting position, and operating angles should be evaluated at the same time.
Step 11: Consider Transmission and Differential Concerns
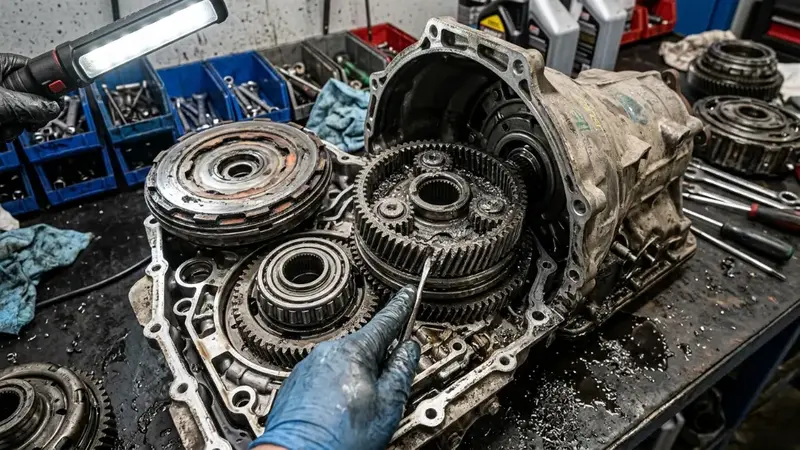
Internal transmission or differential problems become more plausible when vibration appears with other symptoms, such as:
- Gear-specific noise
- Slipping or delayed engagement
- Grinding
- Abnormal fluid contamination
- Bearing noise
- Excessive differential play
- Changes tied closely to load or gear selection
These symptoms still require confirmation. They should not be used alone to authorize transmission rebuilding or differential replacement.
For a broader repair-versus-rebuild evaluation, see common classic car transmission problems.
If symptoms began after a transmission fluid change, see our guide on whether modern transmission fluids can damage classic transmissions for related fluid-compatibility considerations.
Common Diagnostic Mistakes
Avoid:
- Assuming every vibration is caused by tire balance
- Balancing a driveshaft without measuring runout
- Adjusting pinion angle before checking mounts and ride height
- Ignoring recent suspension or drivetrain modifications
The goal is to verify the source—not replace every component that could theoretically cause vibration.
How Coastline Approaches Persistent Vibration
At Coastline Classic Car Restorations in Huntington Beach having 14+ years of experience, we evaluate vibration as a complete vehicle and driveline concern.
We first confirm and classify the vibration by road speed, engine RPM, load, gear, acceleration, deceleration, and temperature.
We then inspect the relevant rotating components, mounts, driveshaft condition, runout, phasing, and operating angles before attributing the complaint to the transmission or differential.
In persistent-vibration cases, a previously replaced or balanced component should not automatically be considered eliminated.
Installation, runout, operating angles, mounts, and surrounding driveline conditions may still need to be verified.
This process is particularly useful when tire balancing, U-joint replacement, suspension changes, or previous drivetrain repairs have not resolved the complaint.
Frequently Asked Questions
Why does my classic car vibrate at a specific speed?
A vibration that consistently appears within a certain speed range may involve wheels, tires, driveshaft balance, runout, operating angles, or another speed-sensitive rotating component.
Speed alone does not identify the failed part.
Why does my classic car vibrate only under acceleration?
Acceleration vibration may involve U-joints, mounts, driveshaft condition, operating angles, or rear-suspension movement under torque.
Should driveline angles be checked after lowering a classic car?
They should be verified after lowering, raising, or changing the transmission, rear suspension, driveshaft, or axle position because those changes may alter U-joint operating angles.
Can several small problems cause one vibration?
Yes. More than one condition may contribute, such as a worn mount combined with driveshaft runout or unsuitable operating angles. Each suspected condition should be measured or verified.
Classic Car Driveline Diagnosis in Huntington Beach
Still dealing with vibration after tire balancing, U-joint replacement, or suspension work?
Contact Coastline Classic Car Restorations in Huntington Beach to discuss a driveline inspection.
Share the speed range, engine RPM, driving conditions, and any repairs or modifications that preceded the vibration.
These details help guide the initial evaluation. Learn more about our classic car transmission and driveline restoration services.